If you were a childhood friend of mine, college roommate, or even post college roommate, or any member of my family you probably think I am the least organized person. Well, that was true then. If you're my husband, you might think differently. After having my own space I've realized how to stay organized. One simple rule, everything has to have a place.
1. Calendar
Having a place for our schedule is huge for me! I get it, we don't have kids so how can we need something to help us schedule? Well, we live very far from our families, my husband goes to National Guard one weekend a month, travels a lot with his job, we both work, I tutor in the evenings, and everyone around us is always getting married and having babies. And in the midst of all of that, I'd like to be able to schedule a trip to see our family or have dinner with friends and not have to search all over creation to see if we have that time available. I feel very confident buying plane tickets without even consulting my husband, scary right?!
So how do we do it?
It's very simple. We have a gmail account that we both log in to. Gmail has a "calendar" button at the top. ANY time that we schedule anything, (that's key here), we put it on the calendar. That way when we go to schedule anything else, it's already there! There's also an app on our iPhones called "Calendars - Google Calendar Client". So we have a website or an app, and everything is there!
Love it!! There's also a to-do list on it as well, so we can both put to the same to-do list!
2. Finances
Ever wonder how much you've spent? or where did the money go? or how much has he spent?
Well, that question also is never something we ask because we both put all of our finances into one app as well!
It's another app.. called "Money Tracker"
After taking all of the bills, savings, etc out we know how much money we have to spend the rest of the month. Dave calls it our "bubble gum and beer" fund. We don't care what we spend it on, just how much is spent. Note: in order to do this, you both have to put EVERY purchase into your phone app or it will not work. Unfortunately this app does not sync with your spouse and there isn't a login, so we have to communicate about how much the other person has spent. It's so easy though, because all of the information is right there!
Make sure that each of you input everything into this:
You can also use
http://www.mint.com/, but I didn't like using it as much as the Money Tracker app.
3. Laundry
Do you hate "laundry day" like I
hated laundry day?! Well, I don't have laundry day anymore. My husband ripped apart my closet and made it amazing. Remember how everything needs a place? Well, I now have a laundry basket for:
- sheets/towels
- cool wash
- whites
- warm wash
(the brown ones are for laundry)
Did you know you can train your husband to put his clothes in the right basket?! I remember babysitting 3 year olds who knew how to do it as well. Once one of the baskets is full it goes straight into the washing machine and then there's never an overwhelming amount of laundry! Amazing!!
If you don't have the space or tools to rip apart your whole closet they make nifty laundry sorters too! Here's an example of one
http://www.bedbathandbeyond.com/product.asp?SKU=18365820
I just have to brag on my husband right here and say that he's amazing for building me this!
4. Mail
I hate having a stack of mail. Remember, everything needs a place.
Step 1: Take care of mail the moment you get it, otherwise it'll stack up and be horrible!
Step 2: I go ahead and shred all the junk mail, and recycle/trash anything else that we don't want.
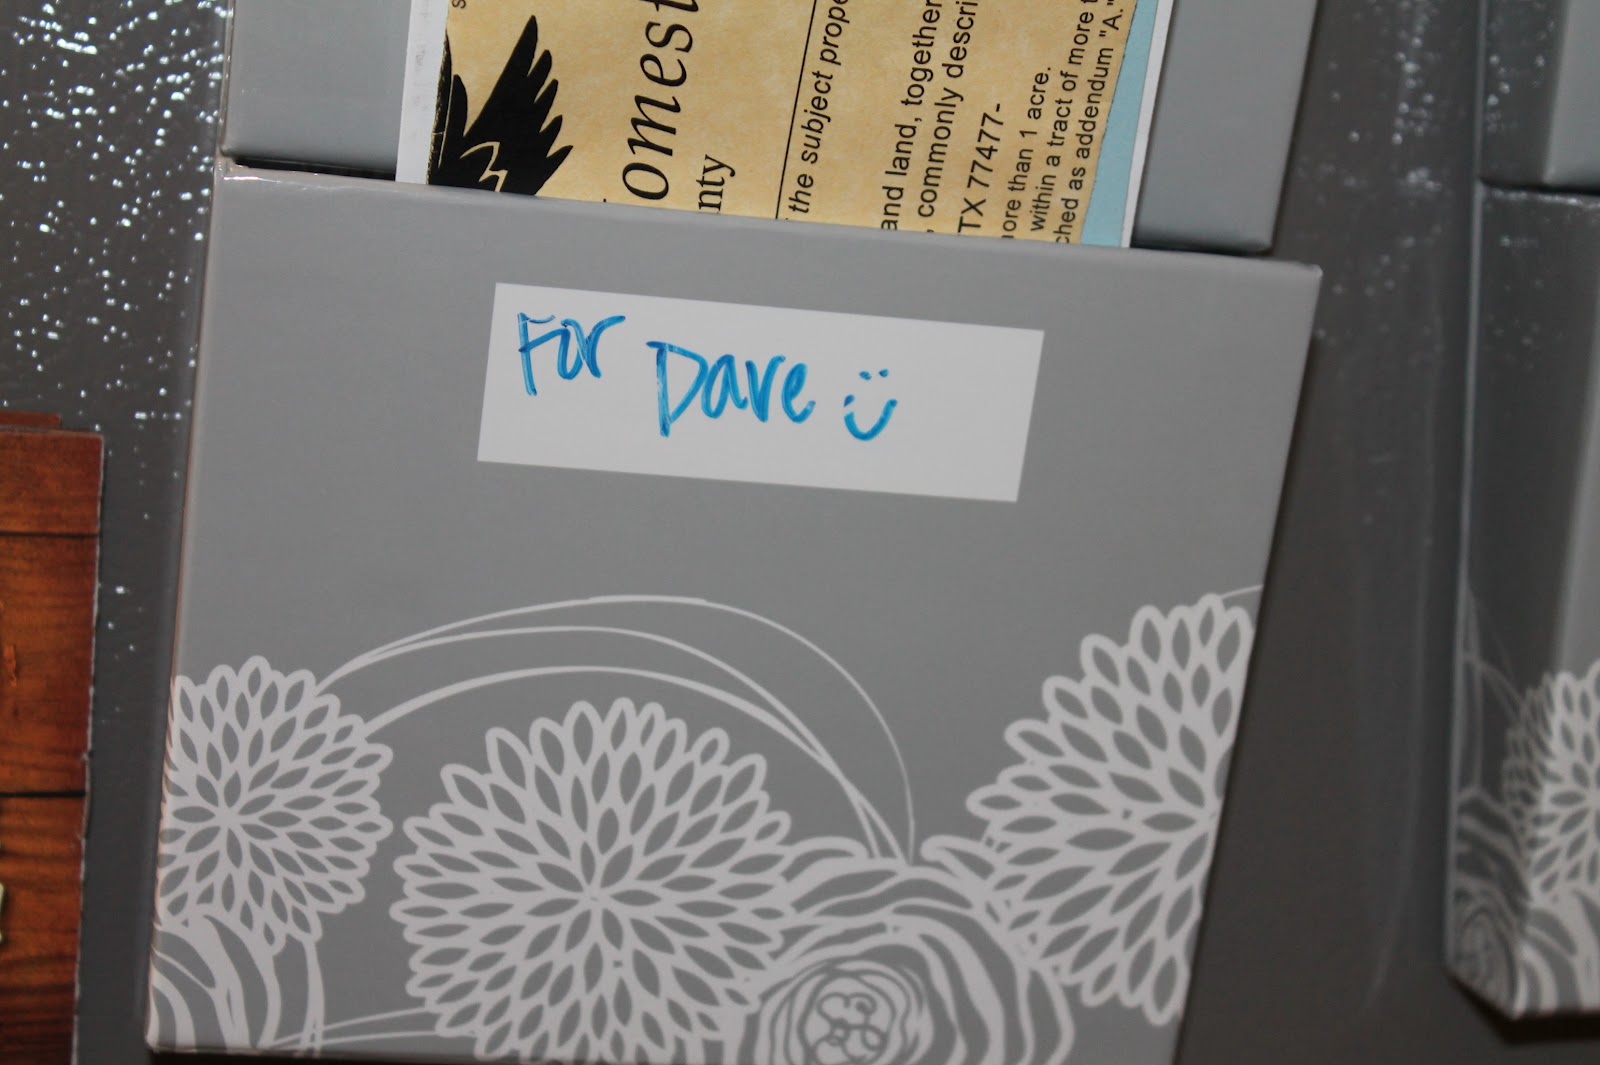
I have this on the side of the fridge, I got it at Target:
To pay/to deposit goes here:
For Camille (if it's something I really don't have time for now):
For Dave (he's gone a lot, remember):
To mail (if it's Saturday afternoon and I wrote a card that can't go out until Monday):
I also got everything to organize this at Target. It's on my desk and keeps track of everything else!
Wedding/bridal shower/etc invitations:
Gift cards:
Coupons go here: (and Coupon Inserts see #6)
Samples (see #6)
Magazines: either go on the coffee table to be read or to our nightstands to be read. Don't forget to clear those out every once in awhile!
OH Yeah - and at Christmas time, we all have a place to display the cute cards, but what do you do with them after?! I scrapbooked them!!
How cute is this?!
Did I forget anything?!
5. Coupons
I follow
http://www.hip2save.com/. You may have read when I got all kinds of
free stuff!! You can read there to see how I get a lot of it. I also track coupons. The blogger at hip2save tells you every time there is a special at a store. So, there's no longer a need to clip coupons. I just date the insert on the front
and then I put them in a binder.
You really only need to keep the last 2 months inserts, after that you can get rid of them.
6. Samples and Pantry
So what do you do when you get all of these samples?! They need a place to go!! I organized the pantry by making different bins. I made a bin for anything that doesn't fit nicely on a shelf.
- seasonings/bouillon
- sweets
- pasta
- rice/sushi
- sports snacks
- paper products
- baking
- popcorn
- chips/crackers
- nuts
(I'm actually happy I don't have a before picture, that would have been terrifying for everyone!)
I also have two lazy susans. One is for things we use all the time (salt, pepper, etc). The other is things that are primarily for cooking sushi, dumplings, stir fry. Those items don't fit well in the spice cabinet.
I have a shelf for boxes of cereal, bisquick, etc.
A shelf of canned items.
And the bottom is filled with soda, trash bags, paper towels, etc.
By organizing everything in this way if I get a sample of something it always has a specific place to go!
7. Linen Closet
Many bins (these help with all the samples!!)
- shampoo/conditioner
- nail items
- soap
- lotion
- hair & makeup
- deodorant
- feminine products
- razors and shaving cream
- toothbrush and toothpaste
- medicine and vitamins
8. Cooking!
I have a cookbook that has all of our favorite recipes in it. It's a 3 ring binder with plastic sleeves so if we like a recipe it goes straight into there! Sometimes I type it up pretty and other times it just goes in there.
If you have kids and want to plan meals, there are many ways to do this!. Less times at the grocery store means less money!! There are so many cute ways to meal plan. I really like the idea of a cute frame with cute paper and a dry erase marker.
http://www.makeandtakes.com/wipe-off-weekly-menu-board
9. Birthdays, holidays, anniversaries, etc!
If you look at my
free stuff. It includes a lot of cards! If you never want to miss a birthday, wedding, anniversary and never want to pay for a card, I'd make a calendar of all of them! Then go to
http://www.cardstore.com/ every time that they have a free card (which is every month and every holiday) and then check off the events as you've gotten the card for them.
I like to just get the cards at random and then choose from my card stack before an event.
10. Storage
There are many things that didn't "have a place". Dave's army stuff, Christmas stuff, ski clothes (we live in Houston..), sports equipment, crafts, extra picture frames, etc. I just made a bin for each of those and then Dave built shelves and we put them in there.
Also, all of our games, extra bags, etc. all got put in bins and were put on shelves as well.
If everything has a place, it's amazing how much time you have to do other things you love, like blog :)
This should save you lots of time, stress, and money!
What other organizing tips do you have?!